Building a Full Stack Web App With Rails and React

I am a backend developer from Venezuela. I enjoy writing tutorials for open source projects I using and find interesting. Mostly I write tutorials about Python, Go, and Rust.
Building web applications has become essential in today's digital world. As an aspiring web developer, React and Rails are two essential tools that can help you build robust and scalable web applications. React is an open-source JavaScript library that allows developers to build complex user interfaces with ease, while Rails is a full-stack web framework that provides the necessary tools to develop server-side applications. Together, React and Rails can be a powerful combination for building web applications.
I know we can build a full-stack app just with Rails because Rails is a full-stack framework. But this article is for the people who want to build an API with Rails and use React to build the UI.
In this article, we will explore how to build a web app using React and Rails, starting from scratch.
We will build a Todo App, to make it simple. First, we are going to build the API. And then, we will build the UI with React to consume the API created.
The article provides instructions on enabling CORS, creating models, controllers, and routes, as well as performing CRUD operations and making HTTP requests to test the endpoints using an HTTP client.
Rails
Rails is a web application development framework written in the Ruby programming language. It is designed to make assumptions about what every developer needs to make web applications easier.
Requirements
Ruby installed
Rails installed
NodeJs installed
Creating the REST API
We choose a directory where we want to develop our application and write the following command to create a new Rails API:
rails new todo_api --api
Enable CORS
We want our React app to consume the REST API consumes the REST API, so we have to enable CORS first.
We go to config/initializer/cors.rb. We will a file like this:
# Be sure to restart your server when you modify this file.

# Avoid CORS issues when API is called from the frontend app.
# Handle Cross-Origin Resource Sharing (CORS) in order to accept cross-origin AJAX requests.

# Read more: https://github.com/cyu/rack-cors

# Rails.application.config.middleware.insert_before 0, Rack::Cors do
#   allow do
#     origins "example.com"
#
#     resource "*",
#       headers: :any,
#       methods: [:get, :post, :put, :patch, :delete, :options, :head]
#   end
# end
We need to un-comment from line 8 to line 16:
# Be sure to restart your server when you modify this file.

# Avoid CORS issues when API is called from the frontend app.
# Handle Cross-Origin Resource Sharing (CORS) in order to accept cross-origin AJAX requests.

# Read more: https://github.com/cyu/rack-cors

Rails.application.config.middleware.insert_before 0, Rack::Cors do
  allow do
     origins "*"

     resource "*",
       headers: :any,
       methods: [:get, :post, :put, :patch, :delete, :options, :head]
   end
 end
We replace origins "example.com" with origins "*".
Then, we go to Gemfile and un-comment the line where gem "rack cors" is. And run bundle install command on the terminal.
Creating the model, database, controllers, and routes.
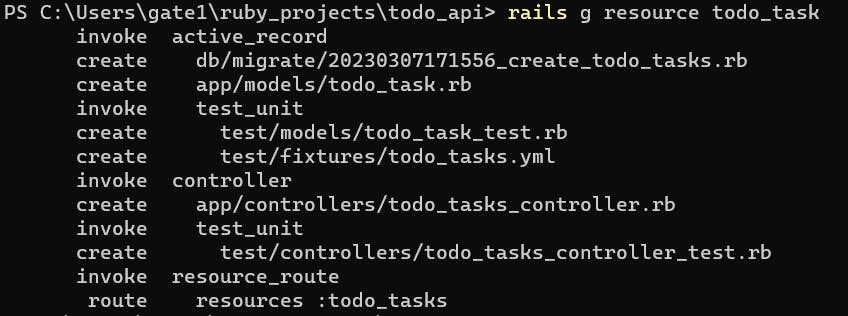
To create the database, models and controllers folder, we run the following command:
rails g resource todo_task
We go to db/migrate/<timestamp>create_todo_task.rb to define the attributes of the todo_task table. There will be two attributes: task as a string, and completed as a boolean.
task will show what task we have pending to do, and completed will show its status.
class CreateTodoTasks < ActiveRecord::Migration[7.0]
  def change
    create_table :todo_tasks do |t|
      t.string :task
      t.boolean :completed
      t.timestamps
    end
  end
end
We run the following command in our terminal, to migrate the table:
rails db:migrate

CRUD operations
We go to app/controllers/todo_task_controller.rb to create the functions that will allow our app to perform CRUD operations.
Index
 def index
        @todo_tasks = TodoTask.all
        render json: @todo_tasks
    end
This controller dispatches a list of all tasks in the database.
Show
 def show
        @todo_task = TodoTask.find(params[:id])
        render json: @todo_task
    end
The show controller sends the task requested by its ID.
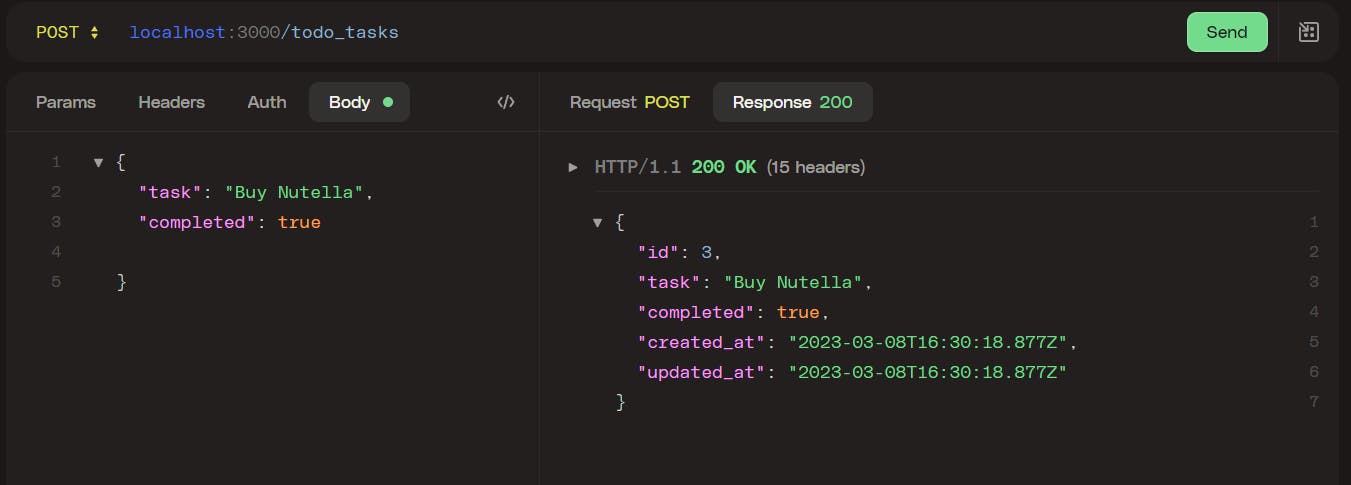
Create
 def create
        @todo_task = TodoTask.create(
            task: params[:task],
            completed: params[:completed]
        )
        render json: @todo_task
    end
This controller inserts a new task into the database. And sends the new task added as JSON to the client.
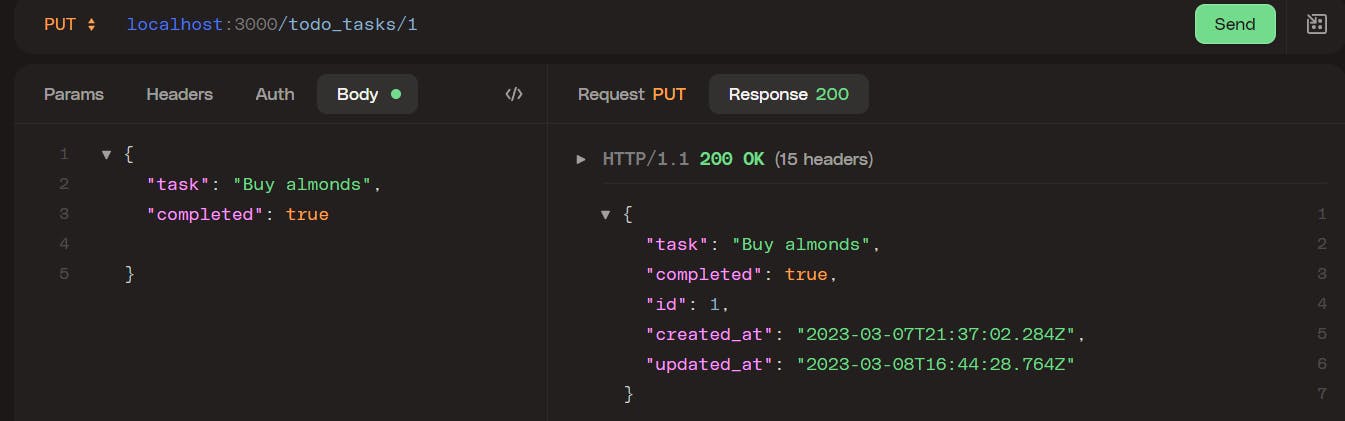
Update
def update
        @todo_task = TodoTask.find(params[:id])
        @todo_task = TodoTask.update(
            task: params[:task],
            completed: params[:completed]
        )
        render json: @todo_task
    end
The update controller extracts the ID parameter and looks for a record in the database that matches. Then, proceeds to update the record.
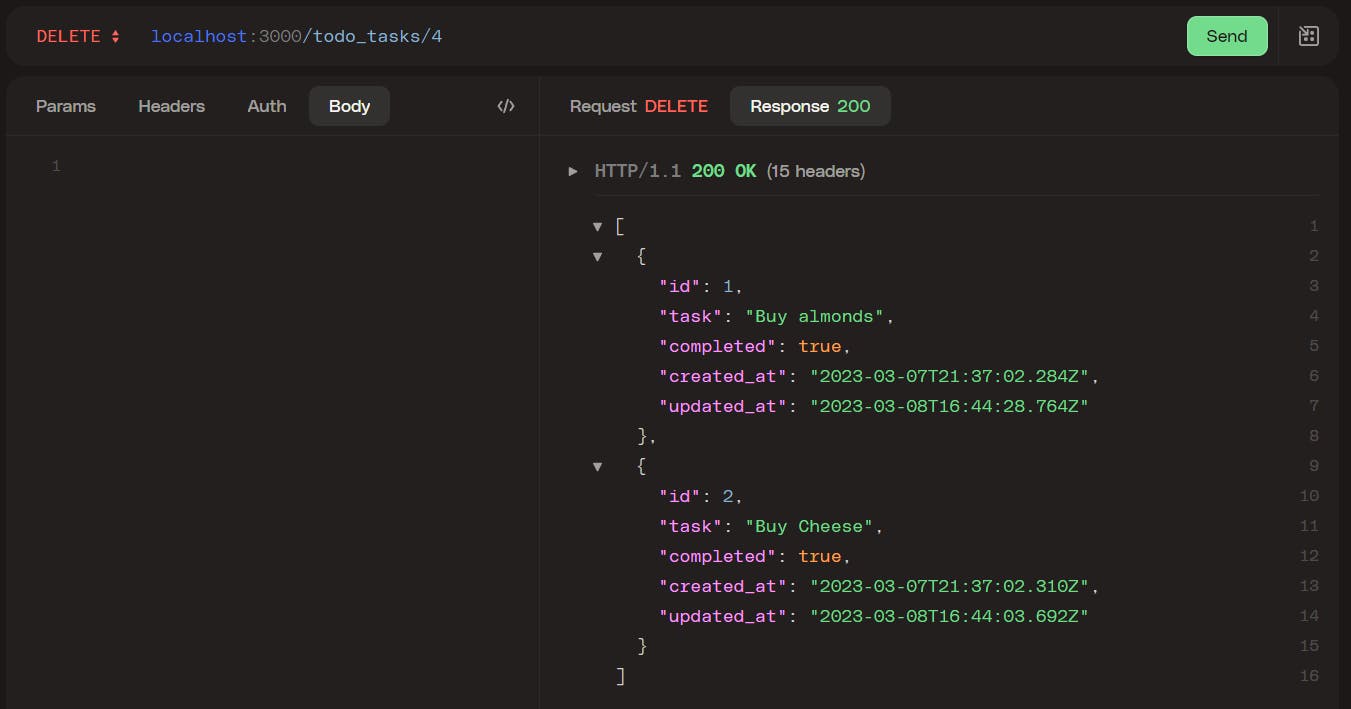
Destroy
def destroy
        @todo_tasks = TodoTask.all
        @todo_task = TodoTask.find(params[:id])
        @todo_task.destroy
        render json: @todo_tasks
    end
The destroy controller deletes the record according to the ID parameter in the request.
Routes
The Rails router recognizes URLs and dispatches them to a controller's action.
Rails.application.routes.draw do
  resources :todo_tasks, only: [:index, :show, :create, :update, :destroy]

end
We set up the resources the router will serve when receiving an HTTP request from a client.
Seed Data
In db/seed.rb we created two records to display when we make HTTP requests.
task_1 = TodoTask.create(task: "Buy fruits", completed: false)
task_2 = TodoTask.create(task: "Buy cheese", completed: true)
Then we run the following command to apply the changes.
rails db:seed
HTTP Requests
Now, we make HTTP requests to make sure our API behaves as we expect.
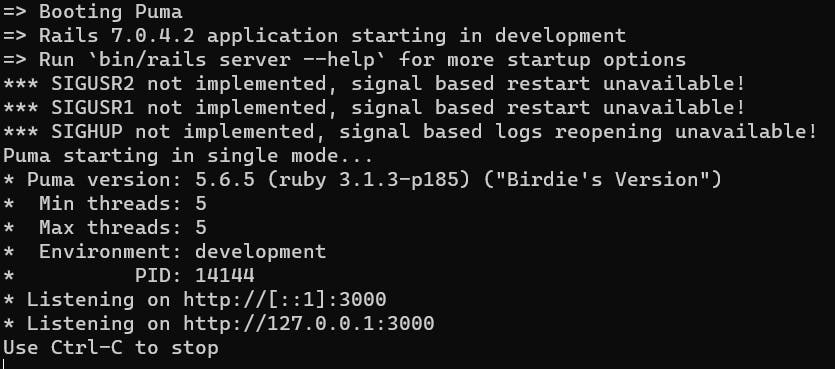
We start the server by running the following command:
rails s
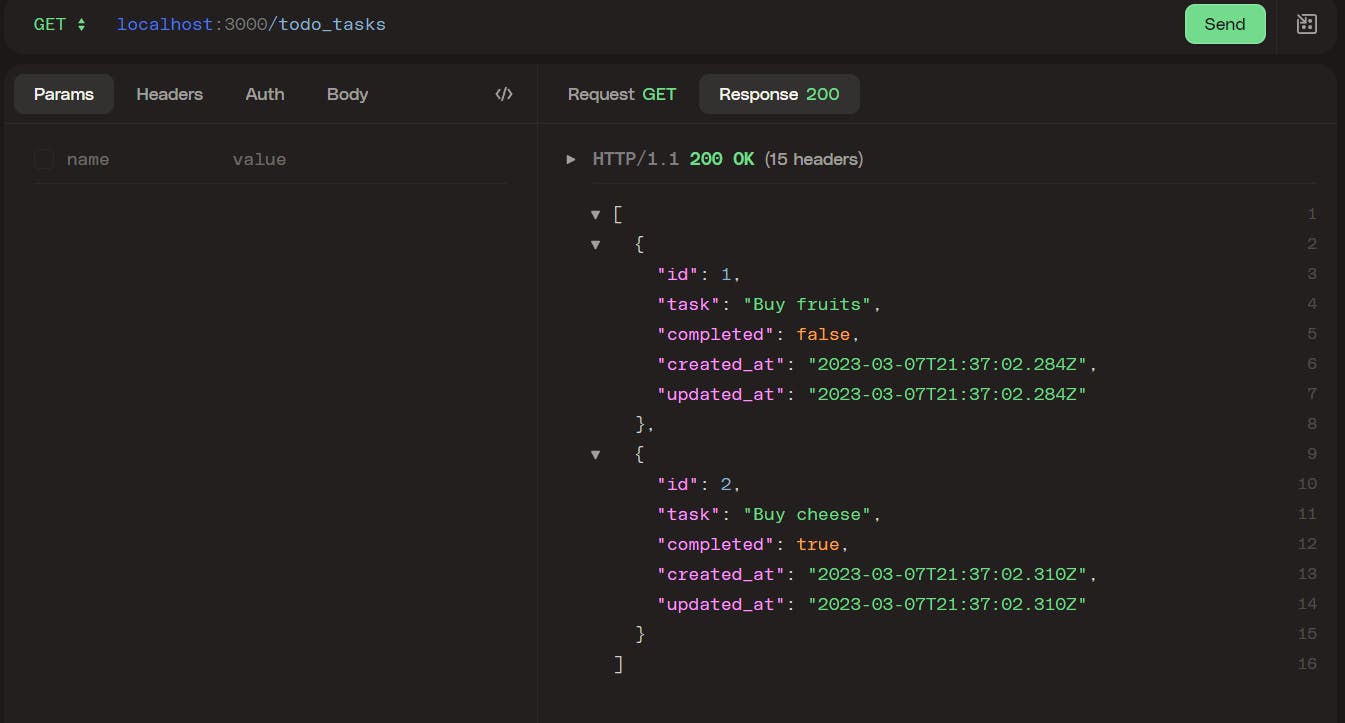
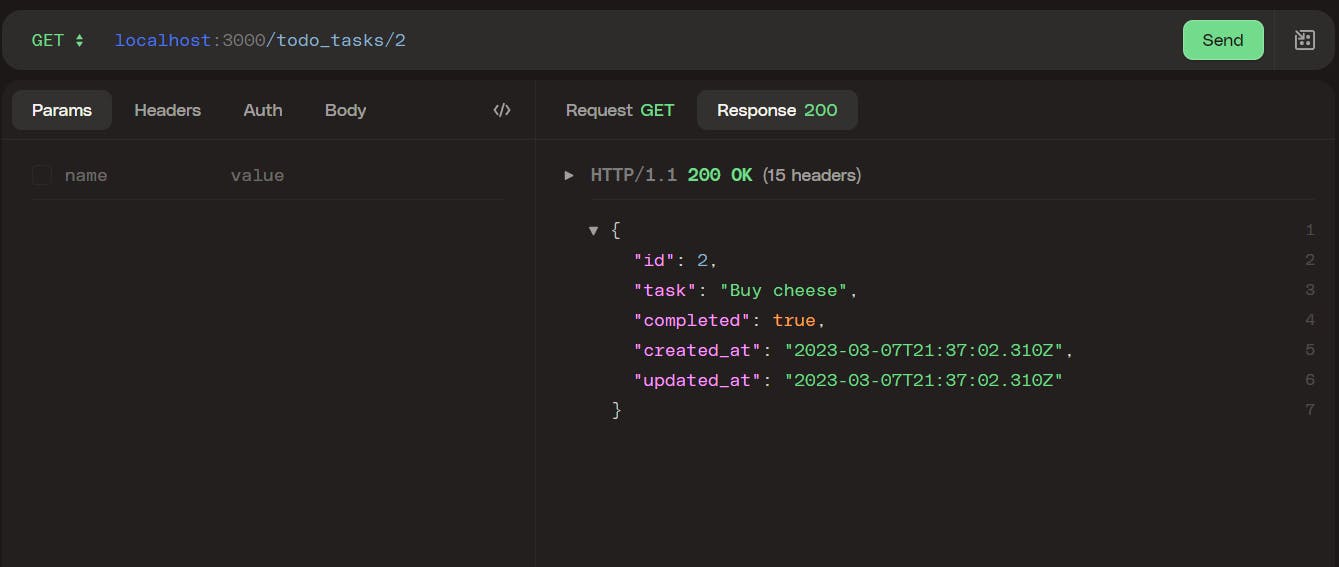
Using an HTTP client, we try all the endpoints.
GET requests
Index
Show
POST request
PUT request
DELETE request
Creating the UI
We will create a separate project folder for the UI.
Installing Vite and React
In our command line, we install Vite with a React-Typescript template. This command line will create a folder for the project.
PowerShell
#npm
npm create vite@latest todoApp -- --template react-ts

#yarn
yarn create vite@latest todoApp --template react-ts
#pnpm
pnpm create vite@latest todoApp --template react-ts
After all the packages are installed we run Vite with the command:
PowerShell
npm run dev
We go to localhost:5173 and should see the Vite and React homepage.
Project Structure
TodoApp/
 public/
 src/
    assets/
    components/
    pages/
    App.css
    App.tsx
    index.css
    main.tsx
    vite-env.ts
.gitattributes
.gitignore
index.html
package-lock.json
package.json
tsconfig.json
tsconfig.node.json
vite.config.ts
Getting a list of all the tasks.
We will put all the code to perform CRUD operations in one file, Task.tsx .
So we create a new file src/components/Task.tsx and create a function to retrieve all the tasks from the API.
import React, { useState, useEffect, ChangeEvent } from "react";
const url = "http://localhost:3000/todo_tasks";
interface Task {
id: number;
task: string;
completed: boolean;
}
const AppTask: React.FC = () => {
const [tasks, setTasks] = useState<Task[]>([]);
const [task, setTask] = useState("");
useEffect(() => {
fetchtasks();
}, []);
const fetchtasks = async () => {
const response = await fetch(`${url}`)
setTasks( await response.json());
};
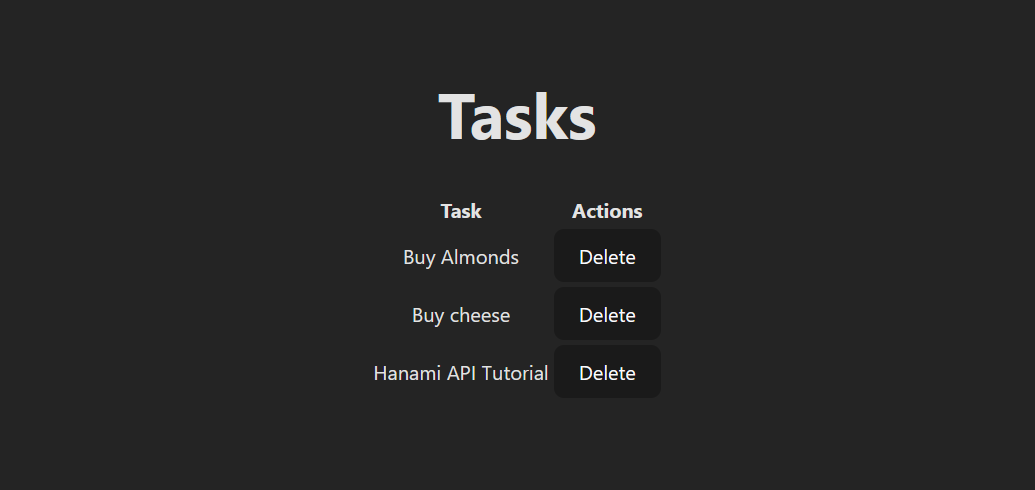
return (
<div>
<h1>Tasks</h1>
<table>
<tr>
<th>Task</th>
<th>Actions</th>
</tr>
{tasks.map((task) => (
<tr key={task.id}>
<td>{task.task}</td>
<td><button onClick={() => handleDeleteTask(task.id)}>Delete</button></td>
</tr>
))}
</table>
</div>
);
};
The component starts by importing useState which is a hook for managing the state within a component, useEffect which is a hook for handling side effects in a component, and ChangeEvent which is an interface for handling changes to form fields.
The component then defines a constant called url which holds the URL for the API endpoint that the component will fetch data from. The interface Task is also defined, which describes the structure of a task object.
Within the component body, two state variables are defined using the useState hook: tasks and task. tasks is initialized as an empty array of Task objects, and task is initialized as an empty string.
The useEffect hook is then used to call the fetchtasks function when the component mounts. The fetchtasks function uses the fetch API to make a request to the url endpoint, and then sets the tasks state variable to the response data.
The component returns some JSX that renders a table of tasks using the tasks state variable. Each row of the table displays the task property of each Task object, along with a Delete button that calls the handleDeleteTask function (which will be defined later in this article).
App.tsx
We go to src/App.tsx to add the AppTask component to the App function.
import './App.css'
import AppTask from './components/Task'

function App() {

  return (
    <div className="App">

    <AppTask/>

    </div>
  )
}

export default App
The component returns a JSX element that represents the component's structure and content when rendered in the browser. The root <div> element has a CSS class name of "App" and contains an <AppTask> component instance.
The import statement at the top of the code imports the AppTask component from a file named Task.tsx in the ./components directory.
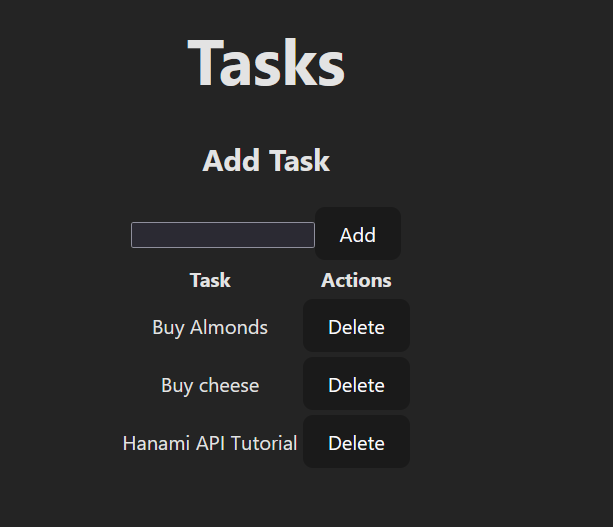
Now, after we saved the changes, we go to localhost:5731 and we should see this page:
Create a new task
Now, we create the function to create a new task and add it to the list.
const AppTask: React.FC = () => {
   ...

    const handleAddTask = async () => {
        const newTask = { task, completed: false};
        const options =  {

            method: 'POST',
            headers: {
                'Content-type': 'application/json; charset=UTF-8',
            },
            body: JSON.stringify(newTask),

        };
        const response = await fetch(url, options)
        const data = await response.json();
        setTasks([...tasks, data]);
        setTask("");
    };
     return (
        <div>
          <h1>Tasks</h1>
          <h2>Add Task</h2>
              <form onSubmit={(e) => e.preventDefault()}>
                <input
                  type="text"
                  value={task}
                  onChange={(e) => setTask(e.target.value)}
                />
                <button onClick={() => handleAddTask()}>Add</button>
              </form>
          <table>
            <tr>
              <th>Task</th>
              <th>Actions</th>
            </tr>


            {tasks.map((task) => (
              <tr key={task.id}>

                  <td>{task.task}</td>
                  <td><button onClick={() => handleDeleteTask(task.id)}>Delete</button></td>
              </tr>
            ))}

          </table>

        </div>

      );
};

export default AppTask;
The handleAddTask function is defined to handle adding tasks to the list. The function creates a new task object with the task that is currently set in the component's state, as well as a completed property that is initialized as false. A POST request is then made to the API endpoint using the fetch API, including the new task object as the request body.
The response from the API request is then parsed using the .json() method, and the data is added to the component's state using the setTasks method and the spread operator to merge the existing tasks array with the new task data.
The setTask method is also used to reset the task state to an empty string.
The form JSX includes an input field with a button that triggers the handleAddTask function when clicked. The form also includes an onSubmit handler to prevent the default form submission behavior
Update task
const handleToggleCompleted = async (id: number) => {
        const taskToToggle = tasks.find((task) => task.id === id);
        const updatedTask = { ...taskToToggle, completed: !taskToToggle.completed };
        const options =  {

            method: 'PUT',
            headers: {
                'Content-type': 'application/json; charset=UTF-8',
            },
            body: JSON.stringify(updatedTask),

        };
        const response = await fetch(`${url}/${id}`, options)
        const data = await response.json();
        const updatedTasks = tasks.map(task =>
            task.id === id ? data : task
          );
          setTasks(updatedTasks);
    };
This function is called handleToggleCompleted, responsible for toggling the completed state of a task when clicked on.
The function takes an id argument that corresponds to the id of the task that was clicked on. The function first finds the task with the matching id by using the .find() method on the tasks array.
The next step is to create a new task object with the updated completed property. This is done by using the spread operator to create a new object with all of the properties of the original taskToToggle object, and then modify the completed property to its opposite value using the ! operator.
A PUT request is then made to the API endpoint using the fetch API, including the updated task object as the request body.
The response from the API request is then parsed using the .json() method, and the data is used to update the component's state using the setTasks method and the .map() method to replace the existing task object with the updated task object.
return (
        <div>
          ...

            {tasks.map((task) => (
              <tr key={task.id}>
                  <span
                  style={{
                    textDecoration: task.completed ? "line-through" : "none",
                  }}
                  onClick={() => handleToggleCompleted(task.id)}
                >
                  {task.task}
                  </span>
                  <td><button onClick={() => handleDeleteTask(task.id)}>Delete</button></td>
              </tr>
            ))}
          </table>
        </div>
      );
The task's name is rendered inside a span element, with its textDecoration style is set to "line-through" when the task is completed, and "none" when it is not.
The onClick event listener is added to the span element and when it is clicked, the handleToggleCompleted function is called, passing the task's id as an argument
Delete task
const handleDeleteTask = async (id: number) => {
        fetch(`${url}/${id}`, {method:'DELETE'}).then( () => fetchtasks())
    };
This code defines the function named handleDeleteTask that takes an id parameter of type number. The function sends an HTTP DELETE request to a URL constructed by appending the id to a url variable.
After the request is successfully sent, the fetchtasks function is called.
This function re-fetches the task list from the server and updates the component's state, causing the UI to refresh to reflect the new state of the task list.
Conclusion
In conclusion, this article focuses on creating the backend and API using Rails, with detailed instructions and code snippets to help you follow along and create your API. The article covers enabling CORS, creating models, controllers, and routes, performing CRUD operations, and making HTTP requests. The source code is available on Github, and the article also provides references to additional resources for further learning.
Thank you for taking the time to read this article.
If you have any recommendations about other packages, architectures, how to improve my code, my English, or anything; please leave a comment or contact me through Twitter, or LinkedIn.
The source code of the REST API is here.
The source code of the React UI is here.
Resources
Beginner's guide to creating an API from scratch using Rails.


