Building containers with Buildah.

I am a backend developer from Venezuela. I enjoy writing tutorials for open source projects I using and find interesting. Mostly I write tutorials about Python, Go, and Rust.
DISCLAIMER: This is not a comprehensive article about Buildah or Podman. It explains how to use Buildah to build images and how to build containers.
I write this article to document the process of building an image, and containers that runs Python and a Django application.
We use Buildah for building containers, for running containers we will use Podman.
I will not explain Podman, we are going to use it to run a container with a Django App in it.
Buildah works on several Linux distributions. Is not supported on Windows or Mac platforms. But, it can be installed on Windows via WSL.
Requirements
A Linux Distribution or WSL with a Linux distribution installed.
Podman installed.
Buildah installed.
Python installed.
What is Buildah?
Buildah is a command line tool for efficiently and quickly building Open Container Initiative (OCI) compliant images and containers.
As Tom Sweeney says in his article post it on the Buildah website, Buildah simplifies the process of creating, building, and updating images while decreasing the learning curve of the container environment.
One of the differences between Buildah and Docker is there is no requirement for a container runtime daemon to be running on your system.
According to its README, The Buildah provides a command line tool that can be used to:
Create a working container, either from scratch or using an image as a starting point
Create an image, either from a working container or via the instructions in a Dockerfile
Images can be built in either the OCI image format or the traditional upstream docker image format
Mount a working container's root filesystem for manipulation
Unmount a working container's root filesystem
Use the updated contents of a container's root filesystem as a filesystem layer to create a new image
Delete a working container or an image
Rename a local container
Installation
I have Ubuntu installed on WSL2, the command to install Buildah is:
# Ubuntu 20.10 and newer
sudo apt-get -y update
sudo apt-get -y install buildah
If you have any other Linux Distribution, here are the Installation Instructions.
To install Podman:
# Ubuntu 20.10 and newer
sudo apt-get -y update
sudo apt-get -y install podman
Building a container
After installation, we can verify if there are images installed by writing this command in our command line:
buildah images

Right now I have two images installed.
So, I will remove them using the following command:
buildah rmi <IMAGE ID>

Now I have no images installed.
Also, we can see a list of working containers by running this command:
buildah containers

As we can see, there are no working containers.
Now, let's create a new container.
To be consistent with its tutorial. We will create a working container based on a Fedora image.
container=$(buildah from fedora)

We can see we have an image installed running the buildah images command.

Also, we have a working container.

Let's install Python3 in our container. We run the following command:
# buildah run $container -- dnf -y install python3


As we can see, there are no working containers.
We use the run command to execute commands inside a container. It emulates the RUN command in a Dockerfile. In this case, we install Python with dnf, which is a package manager on Fedora.
To make sure we have Python installed we run the following command:
buildah run $container python3 --version

After Python is installed, we install Pip.
# buildah run $container -- dnf -y install pip
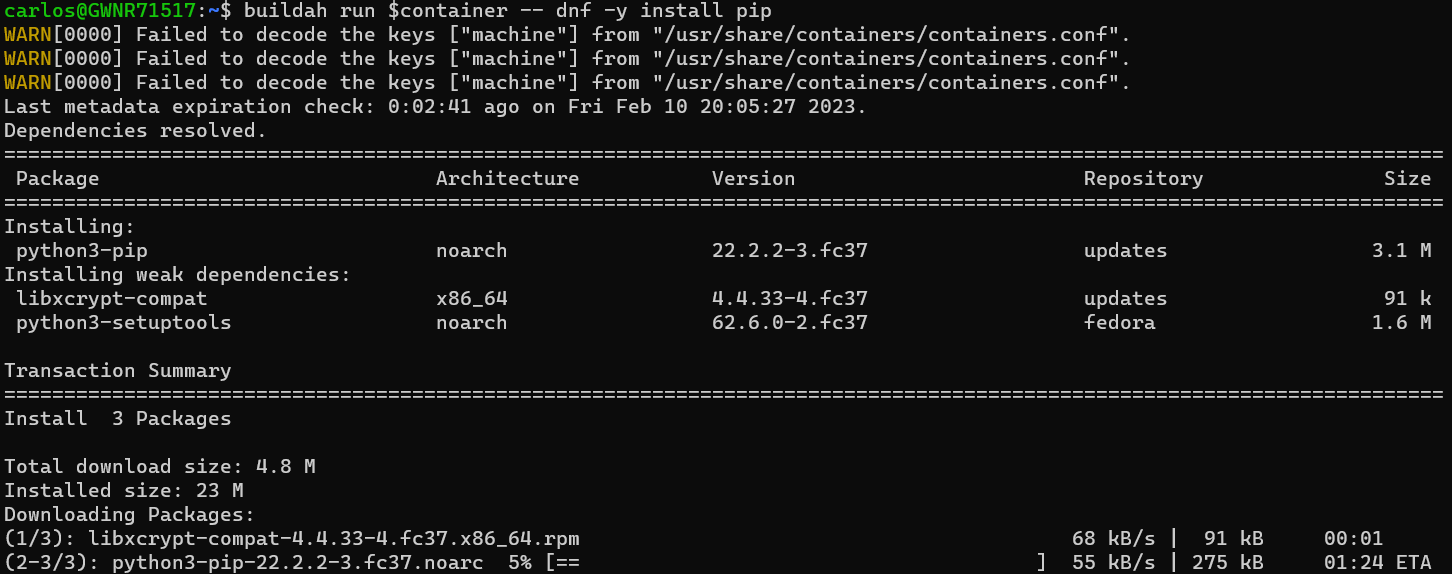
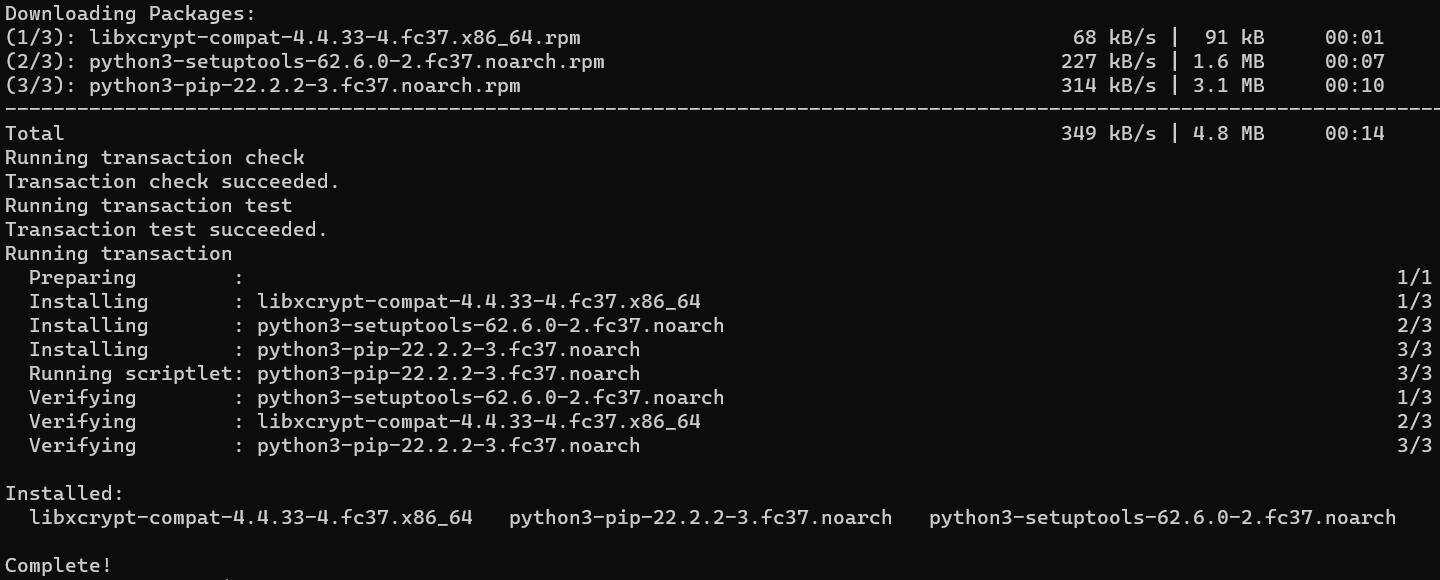
Now, we can install python packages and frameworks inside our container. I want to install Django in a container. But I want to do it in another container. So, before installing Django, we will create another container.
buildah from <IMAGE ID>
The documentation says, the from command creates a new working container either from scratch or from an image.
We should see two containers if we run the buildah containers command.

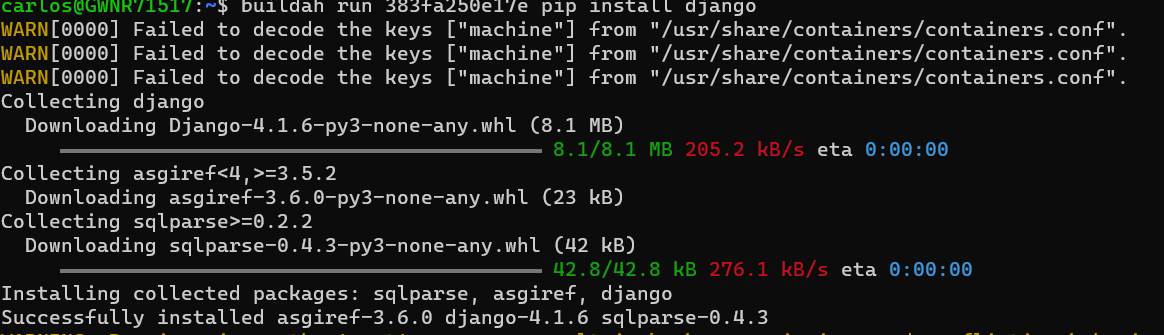
Now, we should be able to install Django.
I will install Django inside the last container we created. So, we have to pass a container ID after the run command, to say to Buildah which container we want to execute.
buildah run <Container ID> pip install django

Now we can create Django Project inside our container.
buildah run <Container ID> django-admin startproject django-demo

To run a Django app, we have to go to the project folder and run the command: python3 manage.py runserver . I supposed it will work to run the command: buildah run 383fa250e17e cd django_demo python3 manage.py runserver . But, it gave me an error.

To be able to run a Django server container, we have to use Podman.
Podman is a tool to run containers and has a feature that allows us to expose the port of our Django App. And we will use it further in this article.
Let's manipulate our container's files.
Mounting a container
We have to mount the container to access its files.
mountpoint=$(buildah mount $container)


The documentation says that the mount command mount a working container root's filesystem. With this command, we can manipulate the files inside a working container.
Let's create a python file, and copy it to our container. It will be a simple file.
hello_world.py
print("HELLO FROM A CONTAINER")
To copy the file into a container, we run this command:
cp folder/hello_world.py $mountpoint/tmp
We copied the hello_world.py file to the tmp folder of the working container.

Now, if we run python3 $mountpoint/tmp/hello_world.py, we should see the output on our command line.

We are just using the Python interpreter of our machine to execute a Python file inside the container.
But, what if we want to create a container for a Django App like we usually do when using Docker?
Well, we can use a Dockerfile.
Building from a Dockerfile.
We will use the following Dockerfile to create a Django application image.
FROM python:3.11

RUN mkdir /code
WORKDIR /code
RUN pip install --upgrade pip
COPY requirements.txt /code/

RUN pip install -r requirements.txt
COPY . /code/

EXPOSE 8000

CMD ["python", "manage.py", "runserver", "0.0.0.0:8000"]
We use the bud command to build an image from a Dockerfile.
You can use a blank Django application. And paste the Dockerfile inside the project folder, alongside the requirements.txt file.
django_buildah/
    django_buildah/
    manage.py
    Dockerfile
    requirements.txt
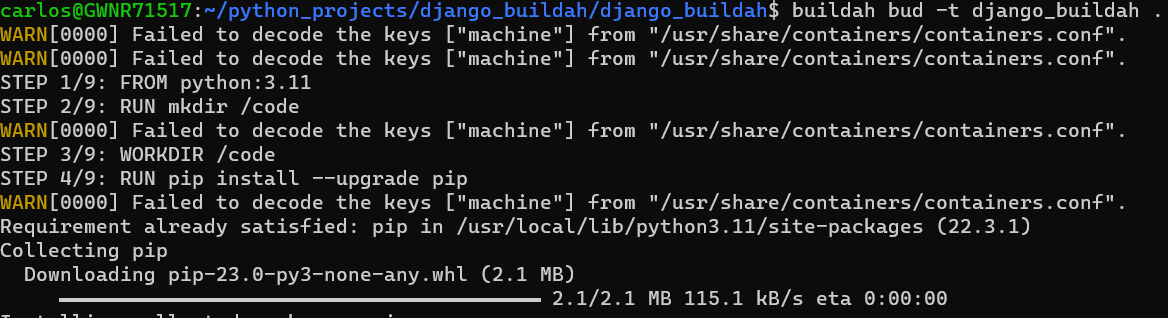
buildah bud -t django_buildah .
We use the command bud to create an image from the Dockerfile. The -t flag is to assign a name to the image, in this case, I used "django_buildah". The last argument is the location of the Dockerfile. I executed the command inside the project folder and the . indicates to Buildah to use the Dockerfile inside python_projects/django_buildah/django_buildah.
With this Django image, we can create a container.
buildah from <Django Image ID>
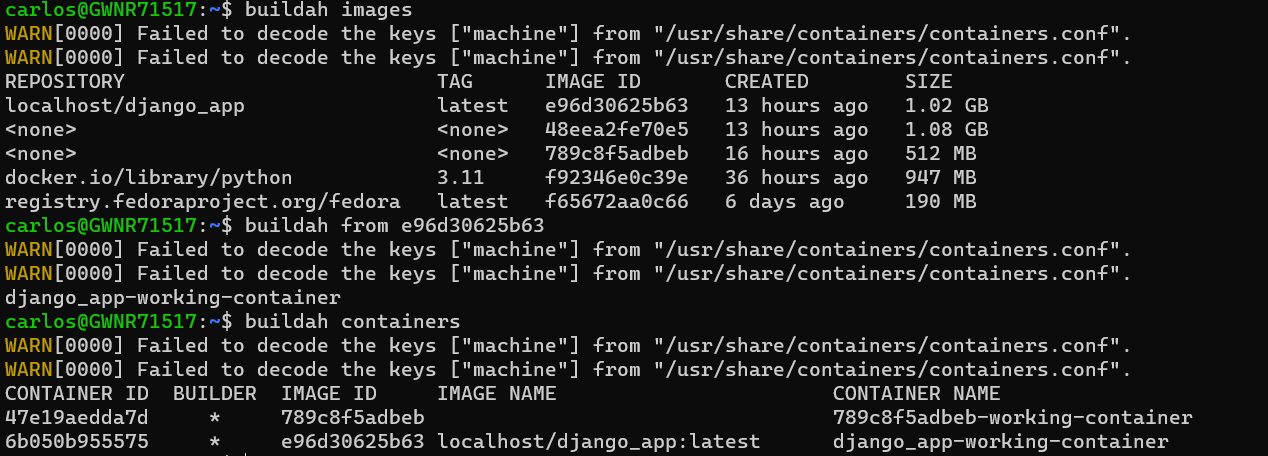
As we can see in the image above, my Django image ID is e96d30625b63, then I created a container from it. Using the containers command we can see Buildah created a container. And the container ID is 6b050b955575.
I want to use the run command, one more time.
buildah run <Container ID> python3 manage.py runserver
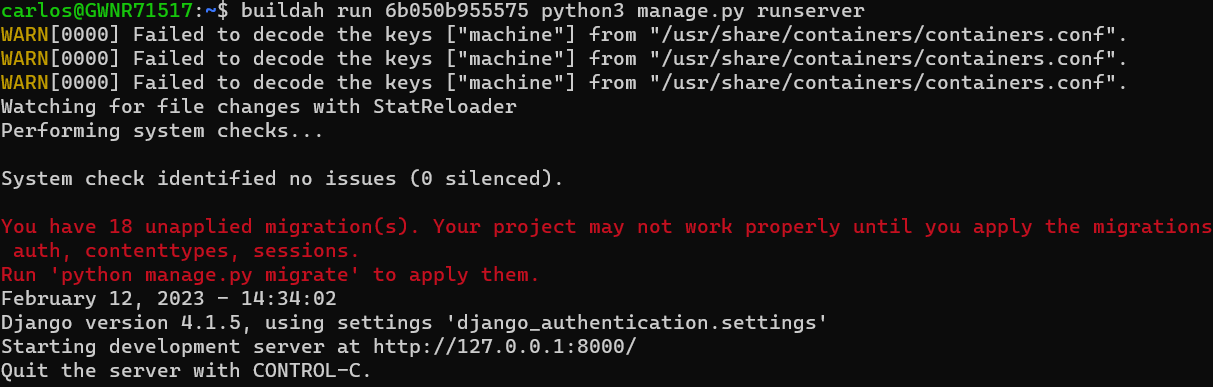
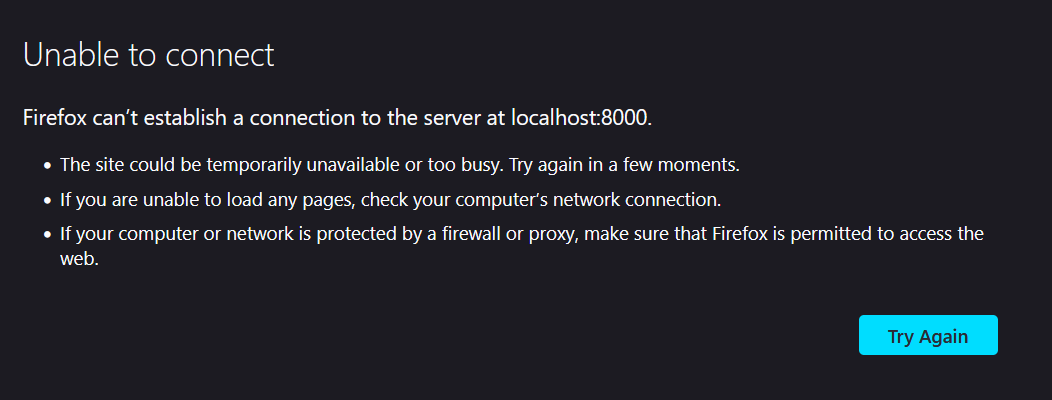
But because there is no port exposed, we have the following issue:
Running a container with Podman
I want to try Podman, to see how it works.
podman run --rm -p 8123:8000 django_buildah
We use the run command to run a container, it emulates docker run command in functionality. The --rm flag indicates to Podman that it has to remove the container when we shut it down. And the -p flag is to map a port, and the last argument is the name of the image from which we want to create a container and run it.
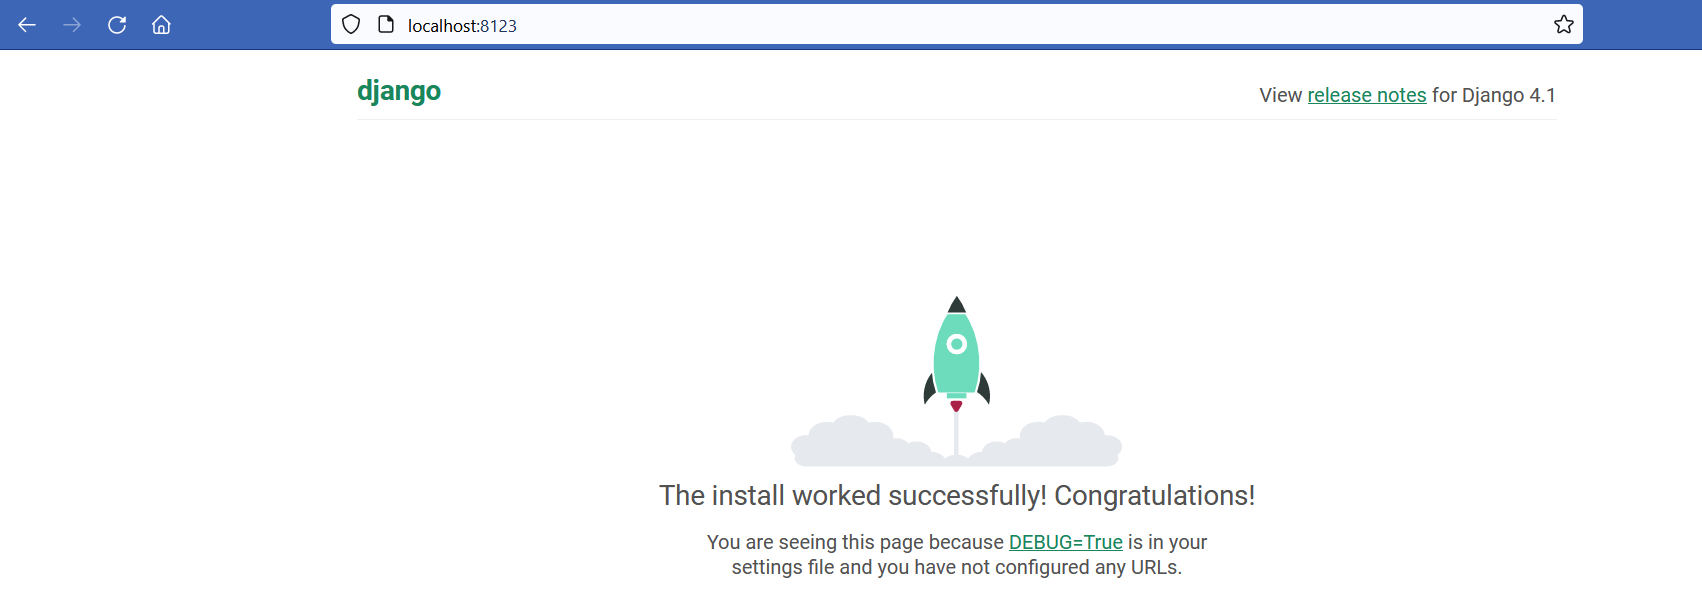
Now it works. If we go to localhost:8123, we should see the Django Welcome Page.
Conclusion
I found interesting the approach of having a CLI tool to build images and containers, and another to run containers. I think they are good alternatives to Docker and they are worth trying.
Both CLI tools were easy to use thanks to their documentation and tutorials.
I apologize for the messiness of this article. The intention was to document the process of building a container with Buildah and see its output in the command line.
Thank you for taking the time to read this article.
If you have any recommendations about other packages, architectures, how to improve my code, my English, or anything; please leave a comment or contact me through Twitter, or LinkedIn.


