How to Build a Mobile App with Ionic Framework and Rails: A Step-by-Step Guide
Creating the UI with Ionic, React and Capacitor

I am a backend developer from Venezuela. I enjoy writing tutorials for open source projects I using and find interesting. Mostly I write tutorials about Python, Go, and Rust.
In this article, we will create a basic UI for a ToDo API developed with Rails in this article. There is no need to develop the server if you don't want to. You can clone it from this repository. Or use any other API that has the following fields:
{
    id: int,
    task: string,
    completed: boolean,
  }
The UI should have the functionality to create a new task, show all the tasks, and update and delete a task.
Ionic
Ionic is an open-source UI toolkit for building mobile apps using web technologies: HTML, CSS, and Javascript. It offers integration for React, Vue and Angular.
Requirements
NodeJS installed.
React knowledge.
Android Studio, download it here.
Android SDK installed (Instructions here)
Ngrok installed
Installation
We need to install the Ionic CLI tool. Ionic apps are created and developed primarily through the Ionic command-line utility. The Ionic CLI is the preferred method of installation, as it offers a wide range of dev tools and help options along the way.
Install the Ionic CLI with npm:
npm install -g @ionic/cli
Starting the app
We will use Typescript for this project and React. We run the following command:
ionic start todoAppIonic blank --type=react
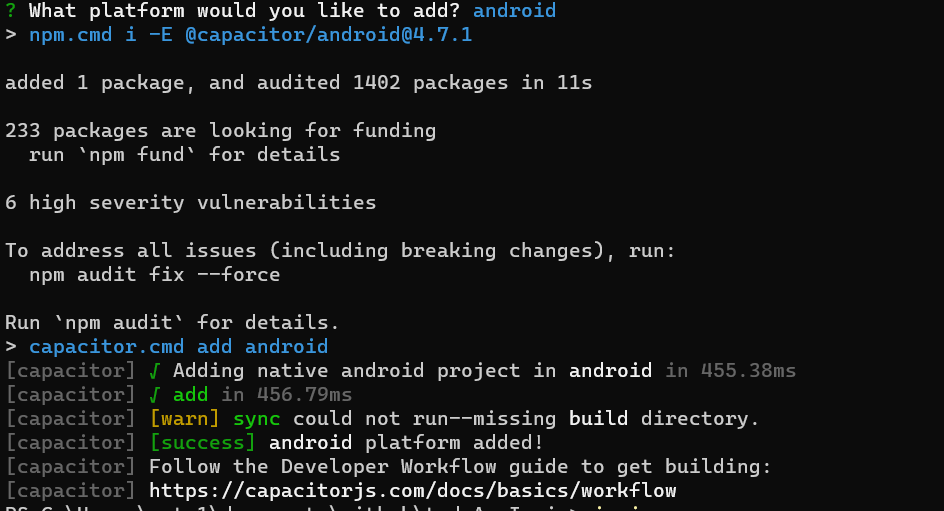
Then we add Capacitor and select Android.
cd todoAppIonic
ionic capacitor add
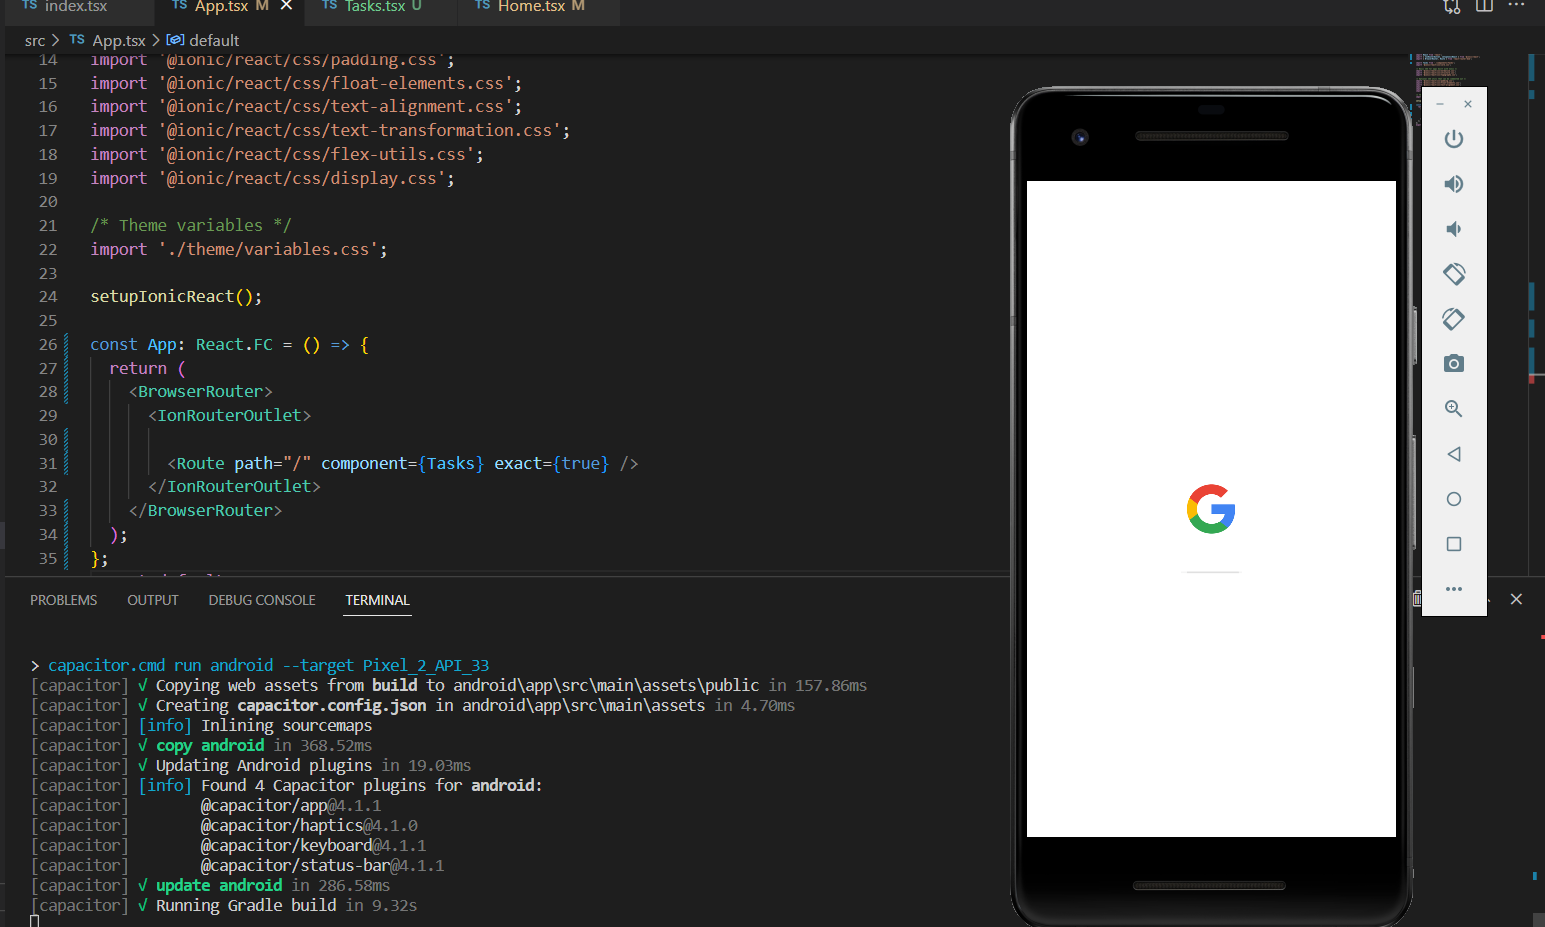
After the CLI installed all the dependencies, we run ionic serve to start the app on our browser.
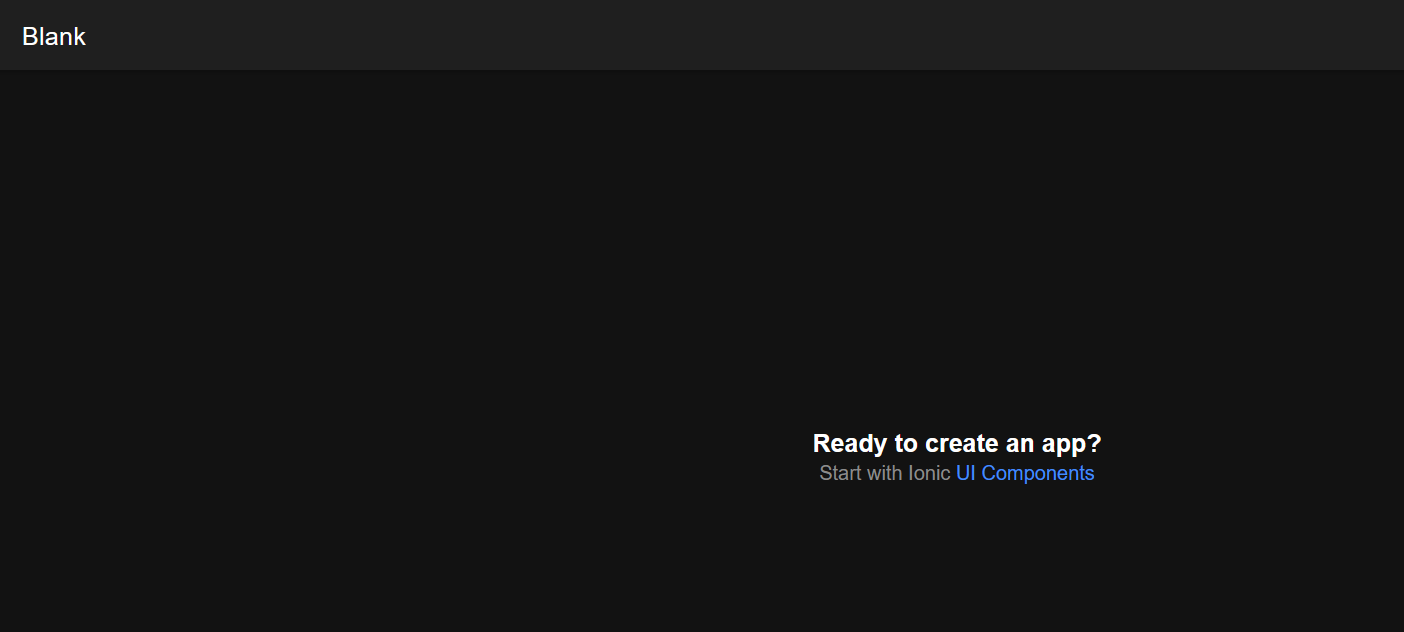
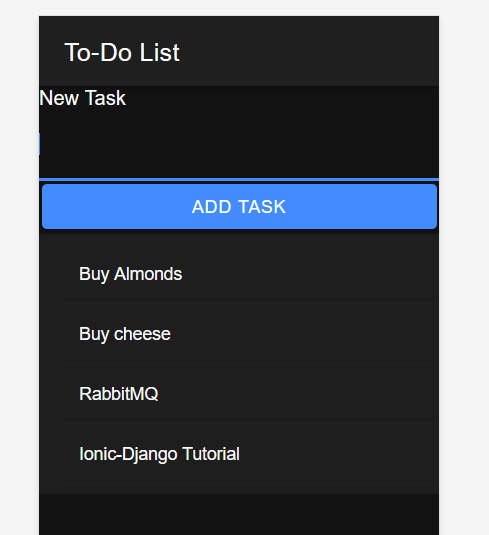
We go to localhost:8100, we should be able to see this page:
Displaying the list of tasks
import React, { useState, useEffect } from "react";
import axios from "axios";
import {
  IonButton,
  IonCardContent,
  IonCheckbox,
  IonContent,
  IonHeader,
  IonInput,
  IonList,
  IonTitle,
  IonToolbar,
  IonLabel,
  IonItem
} from "@ionic/react";
import { Task } from "../Task";

const API_URL = 'http://localhost:3000/todo_tasks';

const Tasks: React.FC = () => {
  const [tasks, setTasks] = useState<Task[]>([]);
  const [newTask, setNewTask] = useState<Task>({
    id: 0,
    task: "",
    completed: false,
  });

  useEffect(() => {
    fetchTasks();
  }, []);

  const fetchTasks = async () => {
    const response = await axios.get<Task[]>(`${API_URL}`);
    setTasks(response.data);
  };
  return (
    <IonContent>
        <IonHeader>
            <IonToolbar>
                <IonTitle>To-Do List</IonTitle>
            </IonToolbar>
        </IonHeader>

      <IonList>
        {tasks.map((task) => (
          <IonItem key={task.id}>
            <IonCardContent>
       {task.task}
      </IonCardContent>

          </IonItem>
        ))}
      </IonList>
    </IonContent>
  );
};

export default Tasks;
It imports two modules - "useState" and "useEffect" - from the React library, as well as the "axios" module for sending HTTP requests, and various Ionic components for building a mobile app UI.
The code initializes a const named API_URL with the url endpoint to fetch data from.
It declares two states (using useState) - tasks and newTask. tasks is an array of objects that represent to-do list items. newTask is an object with three properties - id, task, and completed - that represents a new to-do list item that the user will soon add to the list.
The useEffect hook is used to automatically fetch the current list of to-do items when the component mounts by calling the asynchronous fetchTasks() function. fetchTasks() fetches the data from the API using axios and sets the tasks state to the response data.
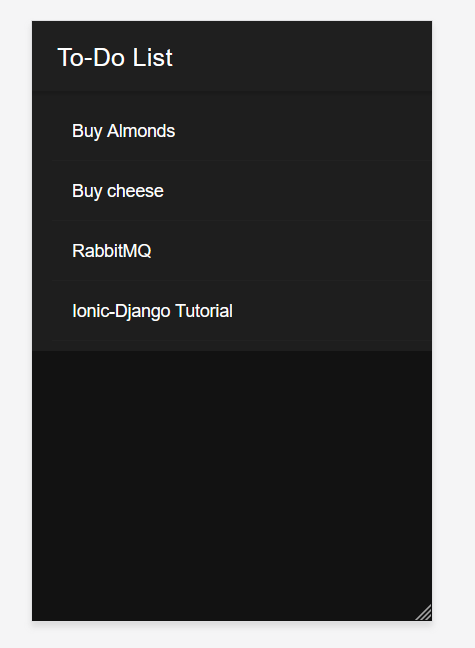
The code then returns the interface of the To-Do List app using Ionic components, which includes a header, title and a content area containing an Ionic list. The tasks state is then mapped over to dynamically render each individual to-do list item as an IonItem component which will display the task name in IonCardContent component.
Then, the Tasks component is exported as the default export of this file to be used further in the app.
Now, we have to go to src/app.tsx and add the component to the App function.
import React from 'react';
import { IonRouterOutlet, setupIonicReact } from '@ionic/react';
import { BrowserRouter, Route } from 'react-router-dom';
import Tasks from './components/Tasks';
import '@ionic/react/css/core.css';

/* Basic CSS for apps built with Ionic */
import '@ionic/react/css/normalize.css';
import '@ionic/react/css/structure.css';
import '@ionic/react/css/typography.css';

/* Optional CSS utils that can be commented out */
import '@ionic/react/css/padding.css';
import '@ionic/react/css/float-elements.css';
import '@ionic/react/css/text-alignment.css';
import '@ionic/react/css/text-transformation.css';
import '@ionic/react/css/flex-utils.css';
import '@ionic/react/css/display.css';

/* Theme variables */
import './theme/variables.css';

setupIonicReact();

const App: React.FC = () => {
  return (
    <BrowserRouter>
      <IonRouterOutlet>

        <Route path="/" component={Tasks} exact={true} />

      </IonRouterOutlet>
    </BrowserRouter>
  );
};
export default App;
The <BrowserRouter> component contains an <IonRouterOutlet> component from the ionic-react library, which provides a component for react-router-dom.
The <IonRouterOutlet> component contains a single <Route> component from react-router-dom. The path prop is set to /, which means that when a user navigates to the root URL of the app, the Tasks component should be rendered.
The exact prop of the <Route> component is set to true, which means that only exact URL matches should render the Tasks component.
Then, in our command line, we execute ionic serve to run the app. And go to localhost:3100 in our browser.
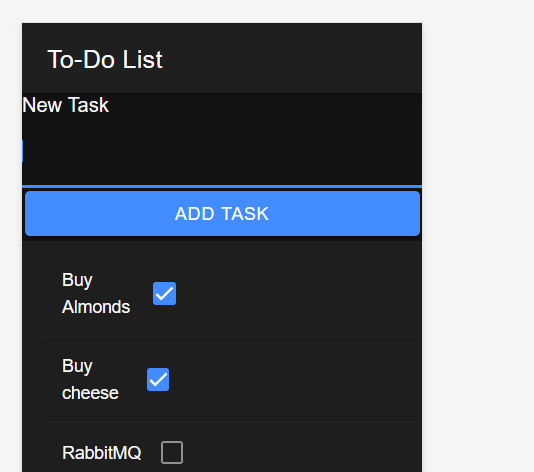
Create a New task
const handleAddTask = async () => {
    const response = await axios.post<Task>(`${API_URL}`, newTask);
    setTasks([...tasks, response.data]);
    setNewTask({ id: 0, task: "", completed: false });
  };
This is a function called handleAddTask() that is called when the user adds a new task to the list. It first sends a POST request to the API by calling axios.post(). The post() method sends an HTTP POST request to the specified endpoint while the newTask object is passed as the request body.
The response from the API is then set as a new task in the tasks state object. This is done by spreading the tasks array and appending the newly added task obtained from response.data.
Lastly, the newTask state object is resetted to its initial values so that the input form is empty again. The id property is set to 0, task is set to an empty string and completed is set to false.
return (
    <IonContent>
       ...
        </IonHeader>
        <IonLabel position="floating">New Task</IonLabel>
        <IonInput
        aria-label="New Task"
        value={newTask.task}
        onIonChange={(e) =>
          setNewTask({ ...newTask, task: e.detail.value!.toString() })
        }
      />
      <IonButton type="submit" expand="block" onClick={handleAddTask}>Add task</IonButton>
      <IonList>
        ...
      </IonList>
    </IonContent>
  );
};
This is a part of a React functional component that returns JSX to render a view.
It includes:
<IonContent>component: This is a part of the Ionic UI toolkit that creates a scrollable content container.<IonHeader>component: This is another part of the Ionic UI toolkit responsible for creating a toolbar in the view.<IonLabel>component: This creates a floated label for the input field below it. The label content is "New Task".<IonInput>component: This creates an input field that gets user input. Itsvalueis set tonewTask.taskwhich is a property of anewTaskobject in the component's state object. When the user types into the input, theonIonChangeprop fires an event listener which calls thesetNewTaskfunction with a new state object, and re-sets thetaskproperty to the newly-typed value.<IonButton>component: This creates a button labeled "Add task" which has an event listeneronClickthat calls thehandleAddTaskfunction when the button is clicked.<IonList>component: This is another component from the Ionic UI toolkit responsible for creating a list view in the component.
Updating a task
const handleTaskCheckboxChange = async (taskId: number,task: string, checked: boolean) => {

    const response = await axios.put<Task>(`${API_URL}/${taskId}`, {
        task: task,
        completed: checked,
      })
    const updatedTask = tasks.map((task) =>
      task.id === taskId ? response.data : task
    );
    setTasks(updatedTask);
  };
This function has three parameters: taskId, task, and checked. The taskId is a number representing the id of the task item being updated, task is a string representing the name of the task, and checked is a boolean value determining whether the task is completed or not.
This function uses the Axios library to make a PUT request to update the task item in the database.
It sends an object with two fields - task and completed, which are updated with the task and checked parameter values.
After the PUT request is completed, the list of tasks (tasks array) is updated to reflect the new state of completed for the task item that was updated. The tasks array is updated using the map() function. The updatedTask constant is created by mapping over tasks and returning a new array with the updated task.
Finally, the setTasks() function is called to update the state of tasks, which triggers a re-render of the component with the updated task item.
<IonContent>
    ...
    <IonList>
        {tasks.map((task) => (
          <IonItem key={task.id}>
            <IonCardContent>
              {task.task}
            </IonCardContent>
              <IonCheckbox
               aria-label="task"
                checked={task.completed}
                value={task.task}
                onIonChange={(event) => handleTaskCheckboxChange(task.id, task.task, event.detail.checked)}
              />
              <IonButton  color="danger" onClick={() => handleDeleteTask(task.id)}>
                Delete
              </IonButton>
          </IonItem>
        ))}
      </IonList>
</IonContent>
Within the IonList, it maps over an array of tasks objects and renders an IonItem for each of them.
For each task, it renders the task.task as content within the IonCardContent.
It also renders an IonCheckbox component for each task, taking three props: checked, value, and onIonChange. checked prop sets the initial value of the checkbox to the completed value of the task object. The value prop is set to the task.task and the onIonChange prop is set the function called handleTaskCheckboxChange that will be executed when the checkbox value changes. The function is passed the task.id, task.task, and the current checked value of the checkbox.
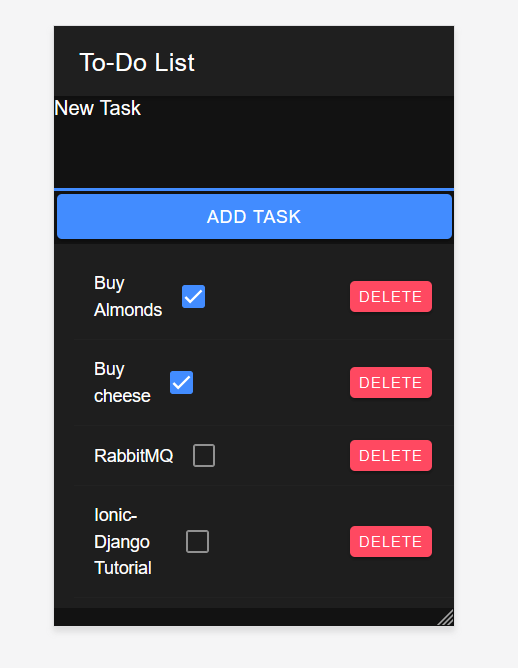
Additionally, there is an IonButton component for each task that has a click event listener calling handleDeleteTask function with the task id passed as an argument that will delete a given task when clicked.
Delete a task
const handleDeleteTask = async (id: number) => {
    await axios.delete(`${API_URL}/${id}`);
    const newTasks = tasks.filter((task) => task.id !== id);
    setTasks(newTasks);
  };
This function makes an HTTP DELETE request to the API with a given task ID to delete the task. Once the request is complete, the function filters out the deleted task from the tasks array using the filter method and sets the new tasks array using the setTasks function.
The await keyword is used before the Axios call to wait for the response from the API before continuing with the next line of code.
<IonContent>
    <IonList>
        {tasks.map((task) => (
          <IonItem key={task.id}>
                ...
              <IonButton  color="danger" onClick={() => handleDeleteTask(task.id)}>
                Delete
              </IonButton>
          </IonItem>
        ))}
      </IonList>
    </IonContent>
The Delete button is defined as an IonButton. When the button is clicked, it calls the handleDeleteTask function with the respective task ID as the parameter, which is defined elsewhere in the code.
Complete Code
import React, { useState, useEffect } from "react";
import axios from "axios";
import {
  IonButton,
  IonCardContent,
  IonCheckbox,
  IonContent,
  IonHeader,
  IonInput,
  IonList,
  IonTitle,
  IonToolbar,
  IonLabel,
  IonItem
} from "@ionic/react";
import { Task } from "../Task";

const API_URL = 'http://localhost:3000/todo_tasks';

const Tasks: React.FC = () => {
  const [tasks, setTasks] = useState<Task[]>([]);
  const [newTask, setNewTask] = useState<Task>({
    id: 0,
    task: "",
    completed: false,
  });

  useEffect(() => {
    fetchTasks();
  }, []);

  const fetchTasks = async () => {
    const response = await axios.get<Task[]>(`${API_URL}`);
    setTasks(response.data);
  };

  const handleAddTask = async () => {
    const response = await axios.post<Task>(`${API_URL}`, newTask);
    setTasks([...tasks, response.data]);
    setNewTask({ id: 0, task: "", completed: false });
  };

  const handleTaskCheckboxChange = async (taskId: number,task: string, checked: boolean) => {

    const response = await axios.put<Task>(`${API_URL}/${taskId}`, {
        task: task,
        completed: checked,
      })
    const updatedTask = tasks.map((task) =>
      task.id === taskId ? response.data : task
    );
    setTasks(updatedTask);
  };


  const handleDeleteTask = async (id: number) => {
    await axios.delete(`${API_URL}/${id}`);
    const newTasks = tasks.filter((task) => task.id !== id);
    setTasks(newTasks);
  };

  return (
    <IonContent>
        <IonHeader>
            <IonToolbar>
                <IonTitle>To-Do List</IonTitle>
            </IonToolbar>
        </IonHeader>
        <IonLabel position="floating">New Task</IonLabel>
        <IonInput
        aria-label="New Task"
        value={newTask.task}
        onIonChange={(e) =>
          setNewTask({ ...newTask, task: e.detail.value!.toString() })
        }
      />
      <IonButton type="submit" expand="block" onClick={handleAddTask}>Add task</IonButton>
      <IonList>
        {tasks.map((task) => (
          <IonItem key={task.id}>
            <IonCardContent>
       {task.task}
      </IonCardContent>
              <IonCheckbox
               aria-label="task"
                checked={task.completed}
                value={task.task}
                onIonChange={(event) => handleTaskCheckboxChange(task.id, task.task, event.detail.checked)}
              />
              <IonButton  color="danger" onClick={() => handleDeleteTask(task.id)}>
                Delete
              </IonButton>
          </IonItem>
        ))}
      </IonList>
    </IonContent>
  );
};

export default Tasks;
Running the app in the Android emulator
Android doesn't allow request from HTTP URLs, we have to use an HTTPS URL. The easiest way I found was using Ngrok. Because Ngrok generates an HTTPS URL to create a tunnel.
ngrok http 3000
The above command generates an HTTPS URL tunnel for our server. But, this is not enough, we have to allow our Rails server to accept this request. We have to go to config/enviroments/development.rb and add the following line inside the Rails.application.configure block:
Rails.application.configure do
  ...
  config.hosts << /[a-z0-9-.]+\.ngrok-free\.app/

  ..
  end
capacitor.config.ts
Before running the app in an Android emulator we have to add a server configuration to the capacitor.config.ts file.
import { CapacitorConfig } from '@capacitor/cli';

const config: CapacitorConfig = {
  appId: 'com.example.app',
  appName: 'todoAppIonic',
  webDir: 'build',
  bundledWebRuntime: false,
  server: {
    "androidScheme": "https",
    "allowNavigation": [
      "ngrok https url"
    ]
  }

};


export default config;
To run the app in an Android emulator, we need to have installed the Android SDK.
We run the following command in our command line:
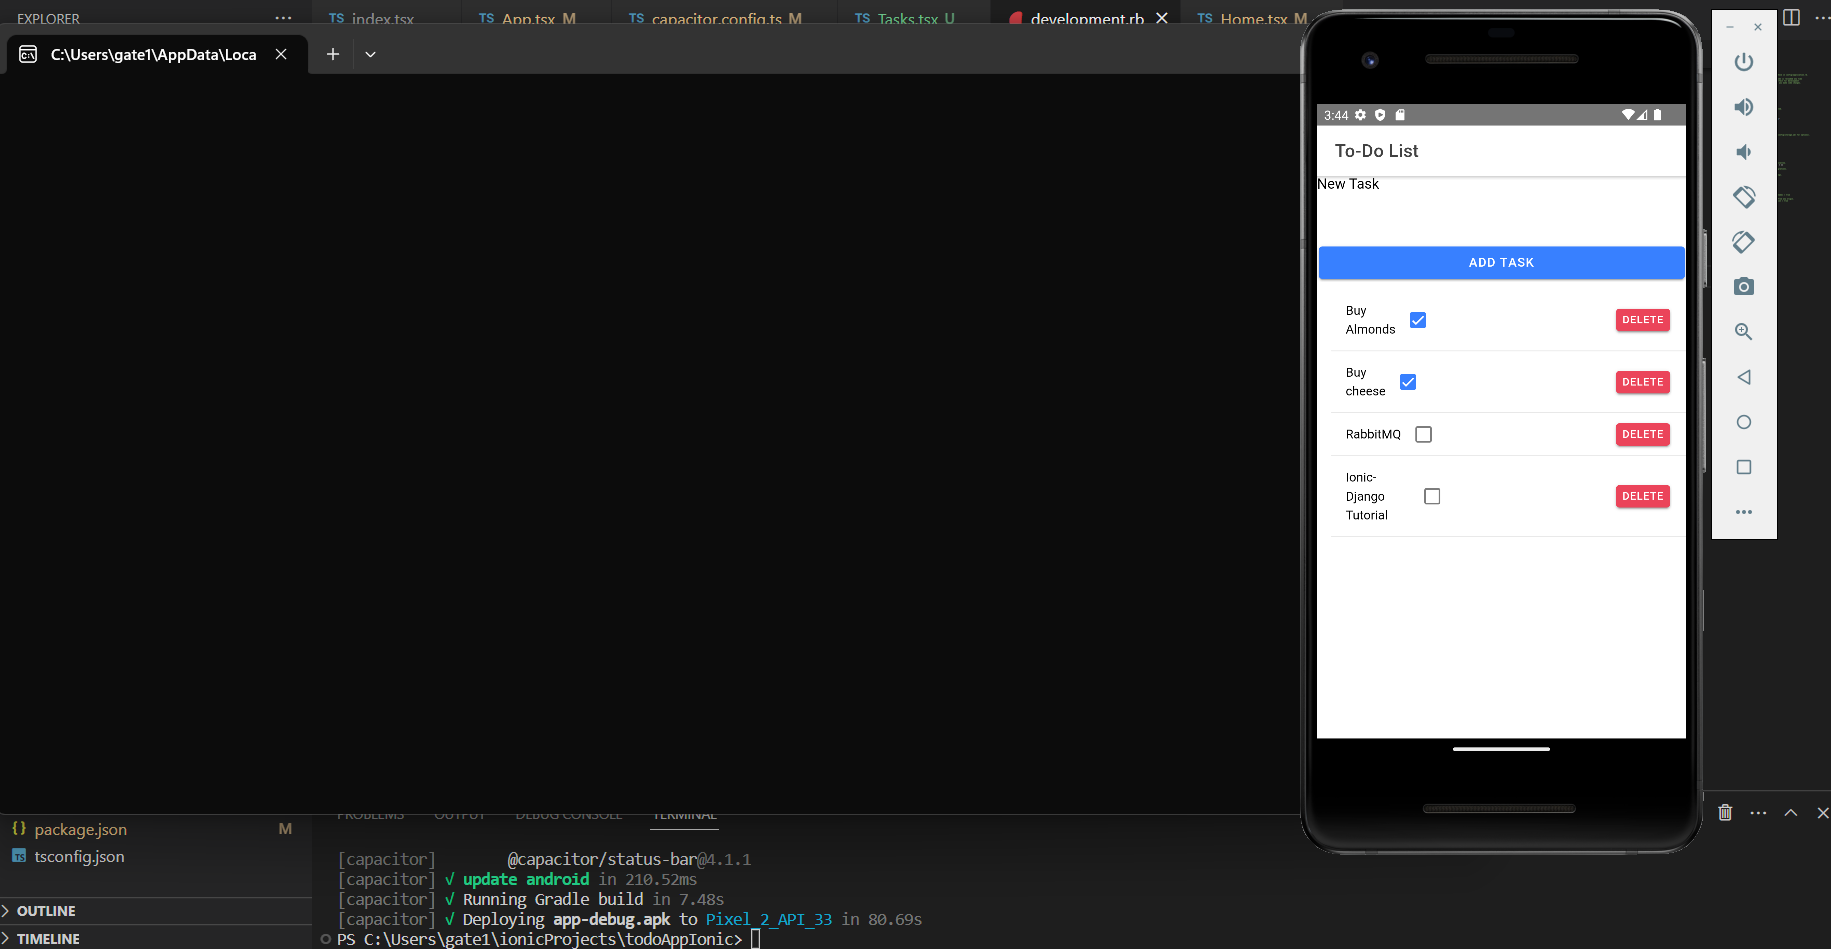
ionic capacitor run android
Ionic will ask you the device target. This message will not appear if we don't have the Android SDK installed.

Then, an Android device will appear on your screen.
Conclusion
This was the first time I build a mobile app, and it was challenging for me. It took me many weeks to build it because I don't have experience with React, so I have to learn both frameworks for this app.
What I dislike about building a mobile app, or an Android mobile app, is all the setup we have to do to build it. Installing Android Studio to download the Android SDK, and make sure we download everything. And I didn't learn how to run the app with Android Studio, which is the reason I use the command ionic cap run android. But, all of this is part of the process of learning something new. Probably this is nothing for a seasoned mobile developer.
About Ionic, I can say much, because this is the first framework I try to develop mobile apps, but the documentation was helpful. I wish it has more example apps or tutorials. But if you have more experience developing UI, then the learning curve will be lower. Also, I really that Ionic allows developing the UI using React, VueJs or Angular, I think that will help to ease its adoption for any frontend developer interested in mobile development.
Thank you for taking the time to read this article.
If you have any recommendations about other packages, architectures, how to improve my code, my English, or anything; please leave a comment or contact me through Twitter, or LinkedIn.
The source code is here.


