How to build an image converter service with FastAPI and deploy it on Deta | Python.

I am a backend developer from Venezuela. I enjoy writing tutorials for open source projects I using and find interesting. Mostly I write tutorials about Python, Go, and Rust.
I have been using Deta for a month and I think is great. It allows you to deploy hobby projects for free, also you have access to Deta Drive to store files.
Prerequisites:
Basic knowledge of Python
FastAPI
Here is what the documentation says about Deta and its services:
Deta:
Deta is a free cloud crafted with the developer and user experience at heart.
It is our mission to dramatically reduce the gap between ideas and working cloud applications
Deta Micros:
Deta Micros are a lightweight but scalable cloud runtime tied to an HTTP endpoint. They are meant to get your apps up and running blazingly fast. Focus on writing your code and Deta will take care of everything else.
Deta Drive:
Deta Drive is a managed, secure, and scalable file storage service with a focus on end-user simplicity.
In this article, we are going to build a service that allows the user to upload an image file to Deta Drive, convert it to another format, and download it.
To simplify this article, the service will take.webp images and convert them to .png using the Pillow library.
We need to create an account in Deta first, go to its website, and create one by clicking on "Join Deta".
Installing Deta
To create a Deta Micro we need to install Deta CLI.
Windows, via PowerShell
iwr https://get.deta.dev/cli.ps1 -useb | iex
MacOS and Linux
curl -fsSL https://get.deta.dev/cli.sh | sh
After Deta CLI is installed and added as an environment variable, we need to login.
data login
Creating a Deta Project
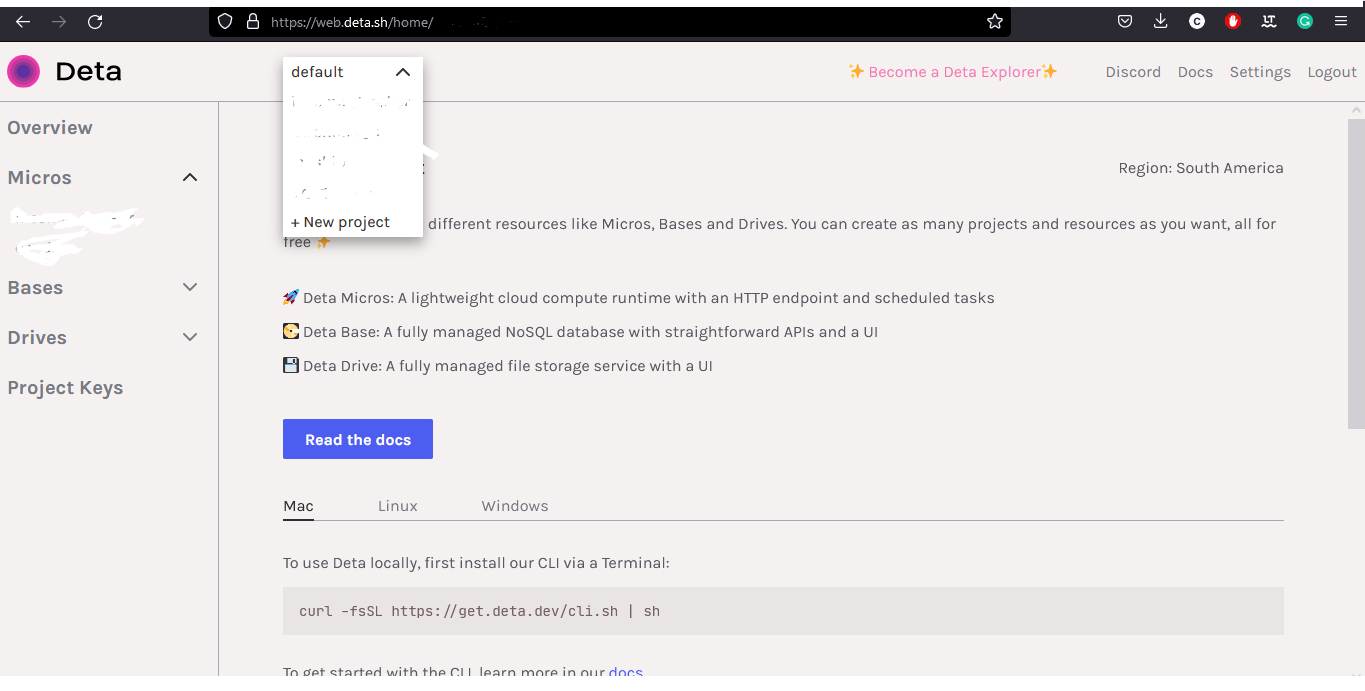
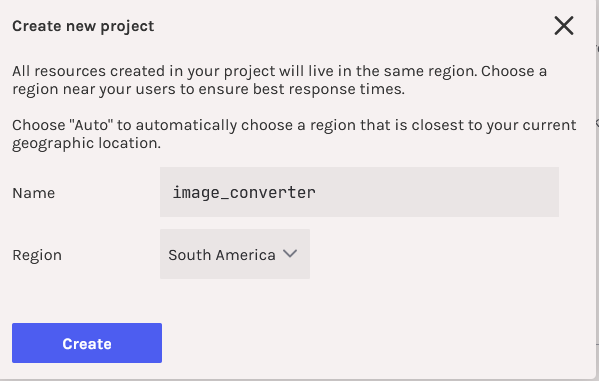
To create a project, we go to our home page and select "+ New project".
Then on our machine, we open a terminal, and inside the folder where we want to place our project we create a new micro.
deta new --python image_converter --project image_converter
If everything is ok, we will see the message "Successfully created a new micro" displayed in our terminal, with the info of our micro.
{
"name": "image_converter",
"id": "id",
"project": "project",
"runtime": "python 3.9",
"endpoint": "https://ce4de8.deta.dev",
"region": "sa-east-1",
"visor": "disabled",
"http_auth": "disabled"

}
Now, we installed our virtual environment and packages.
py -m venv venv

cd venv/Scripts
activate
cd..
cd..
pip install fastapi uvicorn python-multipart python-dotenv pillow deta
We go to our Deta home page, select "Project Keys", and click on "Create Key".
Then we copy the project key into our .env file.
main.py
from fastapi import FastAPI, File, UploadFile, HTTPException
from fastapi.responses import HTMLResponse, StreamingResponse
from PIL import Image
from dotenv import load_dotenv

from deta import Deta
from io import BytesIO
import os


app = FastAPI()

load_dotenv()

PROJECT_KEY = os.environ.get('PROJECT_KEY')
deta = Deta(PROJECT_KEY)

drive = deta.Drive("webp_images")
We import to main.py all the packages we are going to use. Create a FastAPI instance and load our environment variable.
We create a Deta Drive instance. "webp_images" is our drive's name.
Uploading a file.
@app.get("/", response_class=HTMLResponse)
def render():
    return """
    <form action="/upload" enctype="multipart/form-data" method="post">
        <input name="file" type="file">
        <input type="submit">
    </form>

    """
In the same file(we are going to use only the main.py file) we create a GET endpoint to show a form to upload webp image files.

def webp_to_png(image):

    try:
        img = Image.open(image)
        img_io = BytesIO()
        img.save(img_io , 'PNG')
        img_io.seek(0)
    except Exception:
        return "Unable to open the image file."

    finally:
        img.close()
    return img_io
This is the function we use to convert the ".webp" image to a ".png" image.
Here we open the image file and create an instance of BytesIO().
The method Save() receives a filename (string), pathlib.Path object, or file object as first parameter. We are passing a file object. The second parameter is the format.
@app.post("/upload")
def upload_image(file: UploadFile = File(...)):

    if not file.filename.endswith(".webp") or not file:
        raise HTTPException(status_code=400 , detail = "Select a '.webp' file")

    webp_name = file.filename
    image = file.file

    try:

        img = webp_to_png(image)
        png_name = webp_name.replace(".webp", ".png")
        res = drive.put(png_name, img)
        return JSONResponse(status_code =status.HTTP_201_CREATED, content={"message": f"Image: '{res}' successfully uploaded."})
    except:
        return JSONResponse(status_code=500, content="There was an error converting or uploading the file")
In the POST endpoint, here we handle the uploaded file. It will raise an HTTP exception if the file doesn't have a ".webp" extension or no file is selected.
The code will upload the file if there is no problem converting or in the uploading process.
We can go to our Deta home page and check the uploaded file by clicking "Deta Drive". It will show a UI with the files uploaded to our drive.

Downloading Images
@app.get("/convert/{name}")
def converter(name: str):

    res = drive.get(name)

    if res is None:
        raise HTTPException(status_code=404, detail="Image not found")

    return  StreamingResponse(res.iter_chunks(1024), media_type="image/png")
With this endpoint, we check if the file is in the drive, if it is, it will be downloaded.
To retrieve a file we have to include the extension of the image file, in this case, ".png".
Now, the last thing to do is deploy our micro.
In our terminal we execute this command:
deta deploy
We have to make sure the command is executed inside the directory where is the .deta folder.
Conclusion
Deta is simple to use, and for me, it was easy to follow the documentation and tutorials to deploy a micro. Deta supports NodeJS and Python for Deta Micros, Deta Base, and Deta Drive. And there are tutorials for each service using Python and NodeJS.
They have examples of using Deta Drive and Deta Base with Go. I hope in the future we will be able to deploy micros in other languages.
Thank you for taking the time to read this article.
If you have any recommendations about other packages, architectures, how to improve my code, my English, or anything; please leave a comment or contact me through Twitter, or LinkedIn.
The source code is here.


